. -->
Showing posts sorted by relevance for query Daffodils. Sort by date Show all posts

2.18.2013

Dancing with the Daffodils

 to me, spring is heralded by daffodils blooming
so i can't think of a better way to kick off the spring season here on HOMEWARDfound

 daffodils have always been my favorite flower...

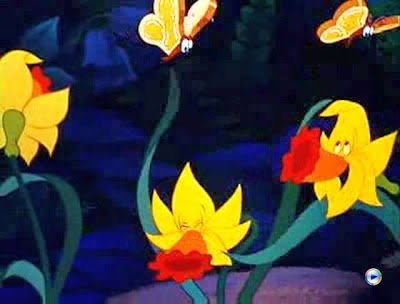
it all started when i first saw the Disney cartoon version of Alice in Wonderland as a child:
the happy goofy silly 'daffy-o-dills' just made me smile!
 and every spring since, the nodding, bouncing, golden heads of narcissus
have been my spring flower of choice.
[image source]

when we moved from Southern California up to Seattle years ago,
we drove up to the Skagit Valley, North of Seattle, in March. 
as we crossed the river and drove in to the farmland,
 i saw a sight that quite literally took my breath away:
Fields of Golden Daffodils
 i was completely surrounded by
hundreds of acres filled with nodding, swaying, happy daffodil blooms!
i had never seen anything like that before... and i was in my own little heaven.
in april, those same fields are home to hundreds of acres of tulips, for the world-famous Tulip Festival.

but to me, the daffodils are the stars...

I wandered lonely as as a cloud
    That floats on high o'er vales and hills,
When all at once I saw a crowd,
    A host of golden daffodils,
Beside the lake, beneath the trees,
Fluttering and dancing in the breeze.

Continuous as the stars that shine
    And twinkle on the Milky Way,
They stretched in never-ending line
    Along the margin of the bay:
Ten thousand saw I at a glance,
Tossing their heads in sprightly dance.

The waves beside them danced, but they
    Outdid the sparkling waves in glee: --
A poet could not but be gay
    In such a jocund company!
I gazed, and gazed, but little thought
What wealth the show to me had brought.

For oft, when on my couch I lie
    In vacant or in pensive mood,
They flash upon that inward eye
    Which is the bliss of solitude;
And then my heart with pleasure fills,
And dances with the daffodils.

 ~ William Wordsworth


whether you get them at a farmstand, a garden center, the grocer, or your own yard,
a bunch of daffodils is a simple and inexpensive way to bring spring home
even before spring gets here! 


4.09.2020

a sunny bunny Easter table

color, color palettes, decorating, DIY, diy decorating, Easter, entertaining, fast cheap and easy, flowers, gift wrapping, spring, Sweet Sweater Bunny Tails, tablescapes, Easter table decor, Easter decorating
 i dunno' what the weather is like where you live, but here, it's positively murky.
gray, rainy, COLD (relatively speaking - it's cold for us!), and dismal.
this whole isolation/quarantine/stay home order would be a LOT easier
if the sun would shine and the weather would warm up 
so we could spend time outside in our yard!

sometimes, we can't wait for the sunshine - or spring - to come to us. 
we have to go to it.
and since we can't go anywhere right now, we have to CREATE a sunny spring.

that's what i did for our Easter table - i created some sunshine!
i grabbed everything yellow i could find and put together a simple, easy, happy tablescape
that's made up of just 'everyday' stuff, coordinated by color.

my homebound friends, you can do this in just minutes with ANY color you have on hand!
don't let being stuck inside the house because of weather or quarantine stop your celebration.

continue reading to see more details that i hope will inspire you to 'get to spring'...

3.25.2014

Tutorial: Recycled Paper Daffodils

I love turning scraps into decor items... paper, for example.
Whether it's leftover gift wrap, an old magazine, or a book of vintage sheet music,
I love looking at it and asking myself 
"OK, what can I do with THIS? (besides pitch it into the recycle bin)."

I did that today, and here's what resulted:
Happy Spring Daffodils, 
made from recycled paper!

How about a tutorial, you say? OK!
Materials:
scissors. masking tape . glue stick . bamboo skewers . paper
 .
 Step by Step:
1. fold sheet of paper (music, construction, magazine page) in thirds as shown.
2. fold in half where the two sides meet in the center.
3. draw half a flower shape with four, five, or six pointed leaves at the double -folded edge of the paper.
4. cut the flower shape out - this will create TWO flowers because of the double fold.
 5. cut a strip of another kind / color of paper - @ 1" wide and 4" long.
6. fold 1/3 of the strip toward the center, lengthwise.
7. unfold the folded third of the strip, and cut slits into it (creating a thick 'fringe').
8. roll the strip over on itself @ the size of your finger, and glue the rolled portion to the flat portion.
9. continue rolling and glue the end of the strip to the roll to secure it.
 10. fold the fringed ends together and glue into place.
11. then add glue to the outside of that end, and 
12. place the rolled section in the center of the cut-out flower shape, with the glue down. 
press to secure.
Now you have a daffodil!
You can glue this to a magnet or card, or shadowbox frame.
To add a stem and leaves, continue....

13. and 14. from the leftover scraps after cutting out the flower shape,
cut a circle about the size of a quarter.
15. secure the back of the daffodil to a bamboo skewer, using a small piece of masking tape.
16. glue the circle you cut out OVER the masking tape, using the glue stick.
 17. cut a leaf-shaped strip from the leftover paper scraps.
18. push the bamboo skewer 'stem' through the paper leaf.
19. put glue on the leaf and wrap it around the bamboo skewer once.
20. wrap the other end of the leaf around a pen or pencil to give it a curling shape, 
like a real daffodil leaf.

 display and enjoy your paper daffodils!
~~~~~~~~~~~~~~~~~~~~~~~~~~~~~~
Here's another method for making them that should remind you of elementary school:
 when you get to step 5
use a cupcake or bonbon paper liner instead of rolled paper for the flower's center!
[ I cut and glued a second circle shape INSIDE the paper cup on this one ]

 using colorful cupcake papers & pages cut from magazines 
results in bright, happy flowers!


3.27.2014

Tutorial: Chenille Stem Daffodils

March ends this weekend... and before it's all over,
I wanted to share ONE LAST DAFFODIL PROJECT with you!

About six years ago, I unearthed a bag of vintage yellow chenille stems at a thrift store.
They were the 'wavy' kind - like these (available HERE):

You know that the first thing I thought of when I saw them was daffodils, right?!
As I was playing with them, making daffodils, I came up with an improvement...
the center section became A CROWN.
... and VOILA! 'DIVAdils' were born!

I still have those same Divadils that I made all those years ago
and thought I'd share a quick tutorial for making them...
Please note that these do use PINS, so they are NOT a kid craft project
and are definitely not for kids to play with.

Whatcha' NEED:
 Materials:
'wavy' chenille stems or rope in yellow or white 
regular chenille stem in green + length of baling wire for stem
yellow or white paper . scissors . glue stick to make the paper crown
yellow or white pompom . 2 regular pins . 3 floral pins with pearl ends

Whatcha' DO:
1. starting at one end of chenille stem or rope, fold two 'wavy' sections together - 
and pinch the skinny section in the middle to make one petal. 
then wrap the end to the next skinny section to secure the petal in place.

2. move down the chenille stem and repeat -
 then wrap the next skinny section once around the petal base to secure it.

3. repeat petal process until you have 3 petals (using a chenille stem) or 6 petals (if using chenille rope).
if you have 3 petals, repeat and create another set of three.

4. if you have two sets of three petals, wrap the two remaining end sections together to attach.
with either method, leave an end section to attach the green stem to...

 5. take the green straight chenille stem and wrap it around the baling wire piece to cover it.
create a small hook at the top of the wire, and slip the remaining end section of wavy chenille through it
on the back side of the flower.

6. wrap the wavy chenille around the top 1/2 inch of the green stem to secure it.

 7. place the pom pom in the center of the front of the flower.
hold it in place using the three flower pins with pearl heads - 
stick them through the pom pom and into the chenille flower petals.
you can use hot glue if you want.

 8. cut a strip of paper @ 1" wide and 4" long.
on one side, cut out a crown shaped edge - basically really long, pointy triangles!
then use a pen or pencil to curl the edges of the points outward.
roll the paper into a tube with the points curling outward.
use a glue stick to secure it into a tube.

 9. slip the paper crown over the floral pins and pom pom.

 10. push the two regular pins into the crown (one on each side),
running them through the pom pom to secure the crown to the flower.

11. bend the tips of the petals into various curved shapes - some forward, some back. 
or close them in on themselves for a daffodil 'bud', as shown below...

 ~~~~~~~~~~~~~~~~~~~~~~~~~~~
I also used the same method to create 
these holiday poinsettias from green vintage chenille stems!
[ the centers of these are metallic plastic mini ornaments ]

shared online:

One Project Closer | Creativity Unleashed

Cupcakes & Crinoline | Project Inspire{d}